


Thangka Iconography: Reading the Sacred Language of Divine Figures
Thangka painting is not decoration-it is a visual scripture. Every color, hand gesture, posture, and object carries precise spiritual meaning. To authenticate a thangka or commission one correctly, you must learn to read this sacred language.
The Five Buddha Families: Color, Direction & Cosmic Role
Every buddha and bodhisattva in Tibetan Buddhism belongs to one of five divine families, each associated with a color, direction, and wisdom quality. Thangka painters follow this classification rigorously. If the colors don't match, the iconography is broken.
| Buddha Family | Color | Direction | Wisdom Quality | Key Deities |
|---|---|---|---|---|
| Vairochana | White | Center | Supreme Purity | Vairochana, Vajradhatu Mandala center |
| Akshobhya | Blue | East | Mirror-like Wisdom | Akshobhya, Manjushri (white variant) |
| Ratnasambhava | Yellow | South | Equanimity & Equality | Ratnasambhava, Citipati (yellow) |
| Amitabha | Red | West | Discriminating Wisdom | Amitabha, Avalokiteshvara, Red Tara |
| Amoghasiddhi | Green | North | All-Accomplishing Wisdom | Amoghasiddhi, Green Tara |
Why this matters for collectors: If you see a "Red Tara" thangka with a completely blue body, or an "Amitabha" with a yellow face, the artist either didn't know the tradition or cut corners. Iconographic consistency signals respect for the lineage.
Mudras: The Language of Hand Gestures
A deity's hands are never random. Each gesture (mudra) conveys a specific spiritual function or teaching moment. Master these five mudras to authenticate any thangka:
Dhyana Mudra — The Meditation Gesture
- Appearance: Both hands resting in the lap, palms facing upward
- Meaning: Perfect meditative absorption; complete inner peace
- Who wears it: Shakyamuni Buddha in meditation, Vairochana, other Buddhas in serene states
- Recognition tip: Look for the hands folded low in the lap; this is the most peaceful mudra
Bhumisparsha Mudra — Earth Witness Gesture
- Appearance: Right hand extends downward, fingers touching the ground; left hand rests in lap
- Meaning: Calling the earth to witness enlightenment; triumph over Mara's doubt
- Who wears it: Shakyamuni Buddha only — and almost exclusively in the moment of his awakening
- Recognition tip: This is Shakyamuni's signature mudra; if you see it elsewhere, something is wrong
Dharmachakra Mudra — Teaching Gesture
- Appearance: Both hands at chest level; thumb and forefinger of each hand form a circle; other fingers extended
- Meaning: Turning the Wheel of Dharma; teaching the path to enlightenment
- Who wears it: Manjushri, Maitreya (Future Buddha), Shakyamuni during his first sermon
- Recognition tip: Hands at heart center, circular thumb-finger gesture—the "teaching" posture
Abhaya Mudra — Fearlessness Gesture
- Appearance: Right hand raised to shoulder height, palm facing outward; left hand often rests in lap
- Meaning: Bestowing protection and dispelling fear; fearlessness in compassion
- Who wears it: Avalokiteshvara, Green Tara, wrathful deities asserting power
- Recognition tip: One hand up like a stop sign—it is a gesture of blessing and protection
Varada Mudra — Boon-Granting Gesture
- Appearance: Right hand extends downward, palm facing outward; fingers pointing down
- Meaning: Offering blessings, abundance, and fulfillment of wishes
- Who wears it: Ratnasambhava, Amitabha (sometimes both hands), Amoghasiddhi
- Recognition tip: Hand down with palm open = generosity and gift-giving
Pro Tip for Buyers: If a seller describes a mudra casually ("oh, the hands are just in a nice pose"), ask for specifics. Correct mudra identification shows deep knowledge of the tradition.
Asanas: Sacred Postures & Their Meaning
The way a deity sits or stands reveals their role: teacher, active bodhisattva, or dancing protector.
Vajrasana — Full Lotus Posture
- Appearance: Both legs crossed, with the soles of the feet visible on opposite thighs
- Meaning: Stability, immovability, and perfect meditation
- Used by: Buddhas, Shakyamuni in meditation, serene deities
- Stability factor: Impossible to knock over—symbolizes unshakeable enlightenment
Lalitasana — Royal Ease Posture
- Appearance: One leg bent and resting on the seat/throne; the other leg hangs down or extends forward
- Meaning: Relaxed, active compassion; readiness to engage with the world
- Used by: Bodhisattvas (Avalokiteshvara, Manjushri), Buddhas in teaching mode, peaceful deities
- Energy signal: Not meditating in isolation—actively moving toward beings in need
Ardhaparyanka — Half Lotus Posture
- Appearance: One leg tucked underneath or in half-lotus; one leg pendant (hanging down)
- Meaning: Balance between meditation and action; swift compassionate intervention
- Used by: Tara (especially Green Tara and Red Tara), wrathful deities in dynamic poses
- Action signal: Ready to move instantly; the posture of quick, decisive help
Pralidhasana — Dancing Posture
- Appearance: Body in dynamic motion, one leg raised, arms in various mudras, often one foot on a demon or corpse
- Meaning: Cosmic dance of liberation; transformation and destruction of ignorance
- Used by: Wrathful deities (Mahakala, Chemchog), Gesar figures, energetic protectors
- Energy: Never static; always in sacred movement
Attributes: Objects in Divine Hands
Every object a deity holds has a precise symbolic meaning. A sword is never just decoration; a lotus is not random.
| Attribute | Meaning | Held by | Iconographic Note |
|---|---|---|---|
| Sword (Teg) | Cutting through ignorance & delusion | Manjushri, Kurukulla (wrathful form) | Sharp edge = direct penetration of confusion |
| Book/Pustaka | Wisdom, scripture, enlightenment teaching | Manjushri, Prajnaparamita, Saraswati | The book is visible or on the palm |
| Lotus (Padma) | Purity arising from samsara; spiritual rebirth | Padmapani, White Tara, Avalokiteshvara | Unfolding petals = consciousness awakening |
| Vajra/Dorje | Indestructibility, masculine compassion, cosmic power | Akshobhya, Samantabhadra, tantric deities | Diamond thunderbolt = unbreakable truth |
| Bell/Ghanta | Wisdom, emptiness, feminine wisdom, sound | Paired with vajra, Prajnaparamita, Tara | Ringing = wisdom manifesting in form |
| Bow & Arrow | Shooting the arrow of compassion into the heart | Red Tara/Kurukulla | Penetrating love; swift intervention |
| Ritual Dagger (Phurba) | Pinning down negative forces; transformation | Guru Rinpoche, wrathful deities | The three-bladed edge pierces illusion |
| Skull Cup (Kapala) | Transmutation of death into wisdom | Wrathful deities, Mahakala | Drinking from the cup = overcoming fear |
| Wheel (Dharmachakra) | Dharma turning; cyclical wisdom | Kalachakra, Vairochana, teaching scenes | 8 or 12 spokes = paths to enlightenment |
| Wish-Fulfilling Jewel (Cintamani) | Abundance, wish-fulfillment, cosmic wealth | Ratnasambhava, Amoghasiddhi | Often glowing or radiating light |
Collector's Red Flag: If a thangka shows Manjushri without a sword, or Padmapani without a lotus, the iconography is incorrect. This happens when artists skip the tradition or clients demand budget cuts.
Putting It Together: Reading a Complete Thangka
When you examine a thangka, ask these four questions:
What color is the main deity? Does it match the Buddha Family table?
What mudra are the hands in? Does it match the deity's known function?
What asana is the deity using? Does it reflect meditation, teaching, or action?
What objects are in the hands? Are they iconographically appropriate?
If even one element is mismatched, you've likely spotted a iconographic error—or an uninformed seller.
The Takeaway on Iconographic Language
Iconography is not esoteric knowledge reserved for scholars. It is the painter's grammar, the collector's authentication tool, and the devotee's visual scripture. Every mudra, color, and attribute is there for a reason. Learning to read it transforms a thangka from a pretty painting into a dimensional spiritual text.
Drawing Buddha Faces: Proportions, Structure & Technique
Understanding iconography intellectually is one step. Rendering it visually is another. This section teaches you to draw the Buddha face—the serene, enlightened visage that appears in every thangka.
The good news: You don't need gold leaf, lapis lazuli, or traditional pigments to master Buddha facial anatomy. The foundation works with pencil, ink, gouache, or acrylic. Gold and color enhance the finished work, but the structure is universal.
Before You Start — What You Need
Materials:
Pencil (HB or 2B for sketching)
Eraser
Paper (A4 or larger)
Ruler (for straight lines and proportions)
Light box or window (optional, for tracing)
Mindset:
Don't expect perfection on the first try
Buddha face drawing is like learning a new alphabet—repetition builds muscle memory
Each practice gets easier
The Basic Three-Box Face
Before drawing details, learn the three equal boxes that make up a Buddha face.
Draw Three Boxes, Stacked
Step 1: Draw three equal rectangles, stacked vertically
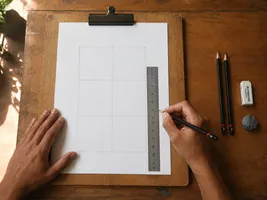
That's it. All Buddha faces fit this grid.
Add the Centerline
Why this matters: If your centerline is crooked, the whole face will look lopsided. Take your time with this line.
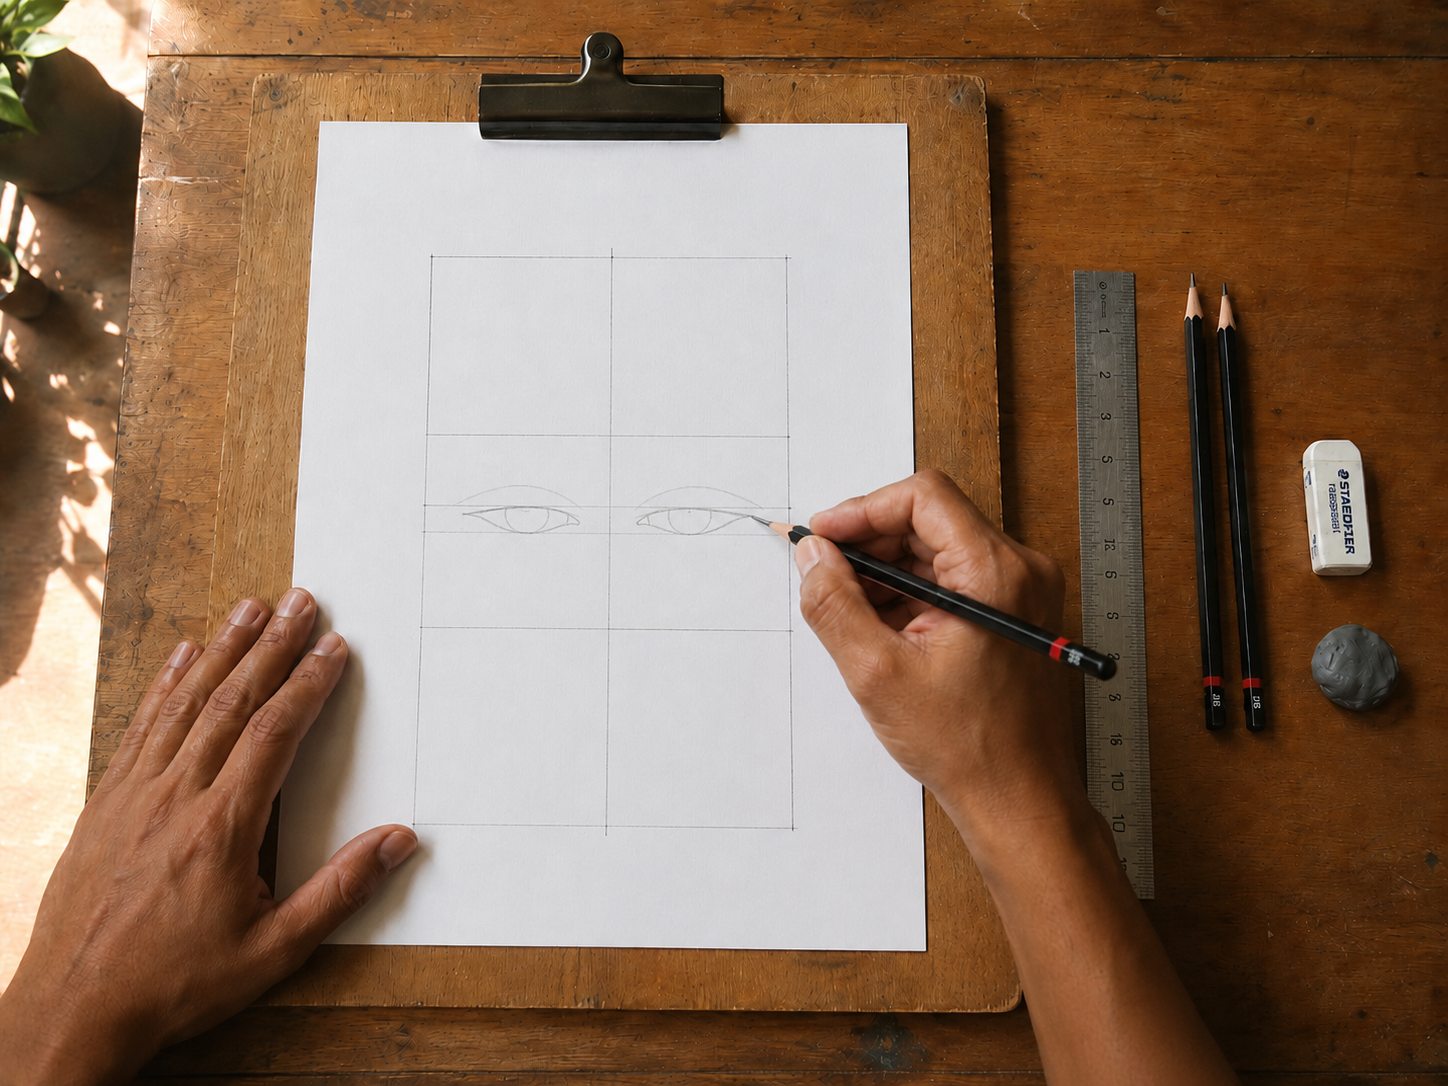
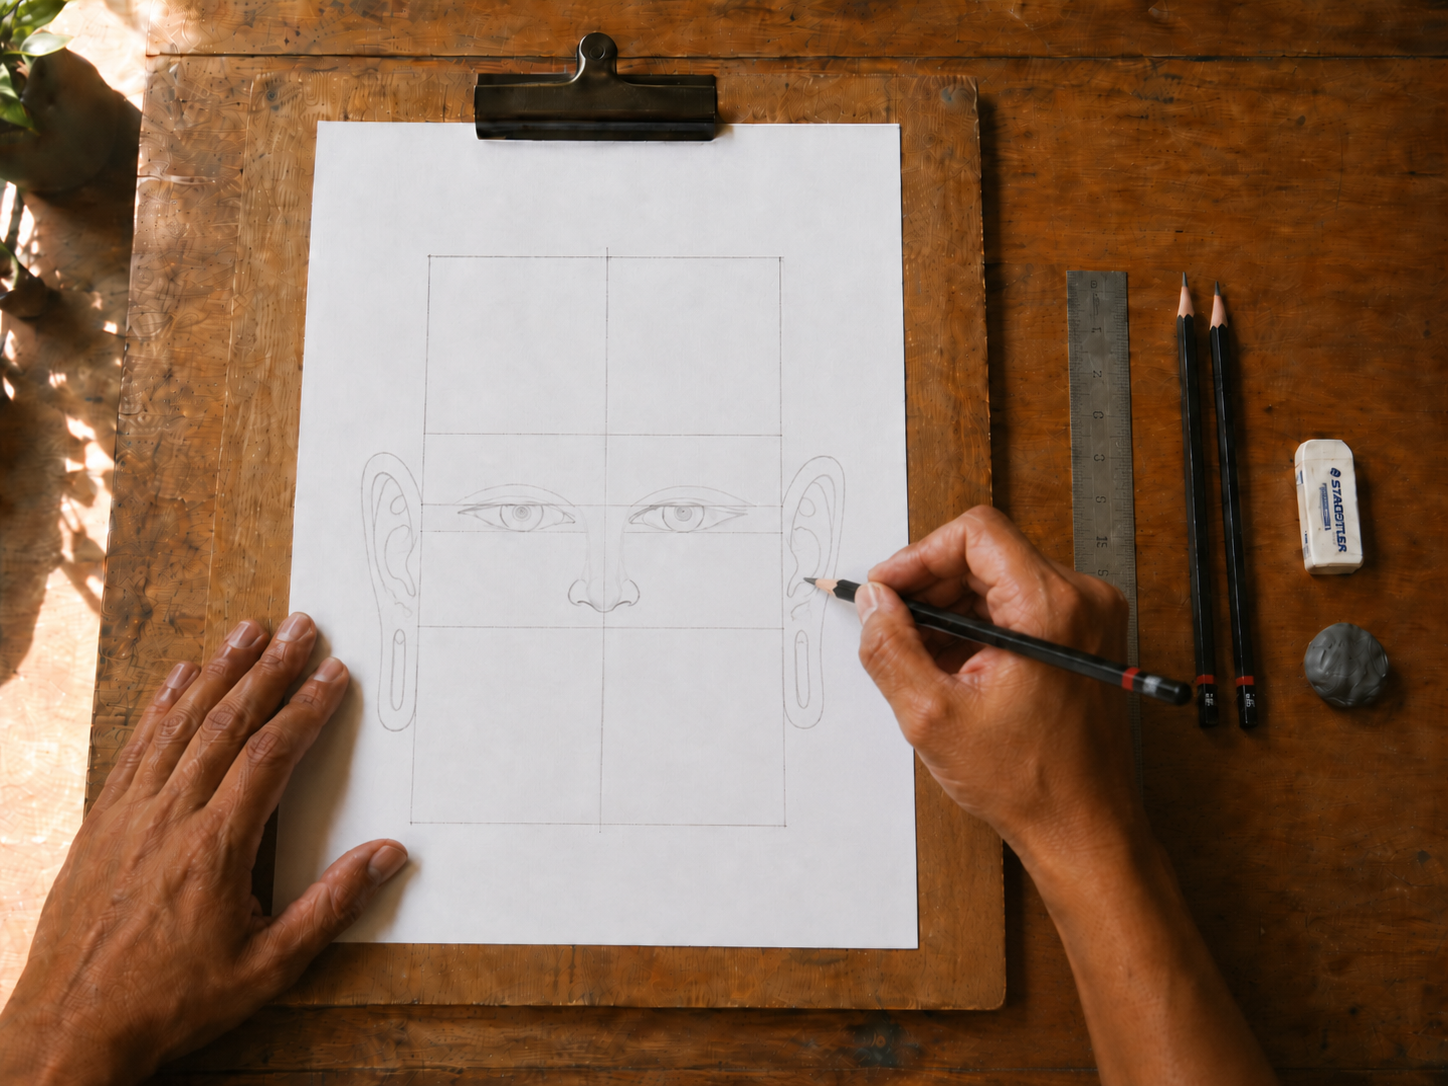
Step 2: Placing the Eyes (Easiest Eyes Ever)
Eyes go in Box 2 (middle box), slightly above the center.
Simple Eye Placement:
Box 2 is where eyes sit:
Rule:
Leave one eye-width of space between the two eyes
Both eyes sit at the same height (use a light horizontal line to keep them level)
Drawing a Simple Buddha Eye (Step-by-Step)
- An eye is just a shape with a dot inside.
- Draw the eye shape (almond)
- Slightly pointed at the inner corner (near nose)
- Gently rounded at outer corner (temple side)
Add the iris (circle inside)
- Draw a small circle (not too big, not too small)
- Add the pupil (tiny dot in the center of iris)
- Small dot in the middle (slightly toward nose side)
Add a tiny white dot (light reflection)
Tiny white spot (upper-left of pupil) This makes the eye look alive
Now draw two of these, side by side with space between Both eyes same size, same height (identical)
Beginner tip: Your first eyes won't be perfect. That's normal. Draw 5 pairs of eyes in a row, and by the 5th pair, you'll see improvement.
Step 3: Drawing the Nose (Super Simple)
The nose in Box 2 goes below the eyes, in the center.
Buddha Nose = 4 Small Lines
A Buddha nose is not complex. It's actually just a few subtle lines:
Nose bridge (tiny vertical line from between eyebrows) Small vertical line (nose bridge)
Add two tiny nostril dots (or small vertical slits) Two tiny dots (almost invisible)
Add a tiny curve at the bottom (nose tip) Soft rounded curve (not pointed)
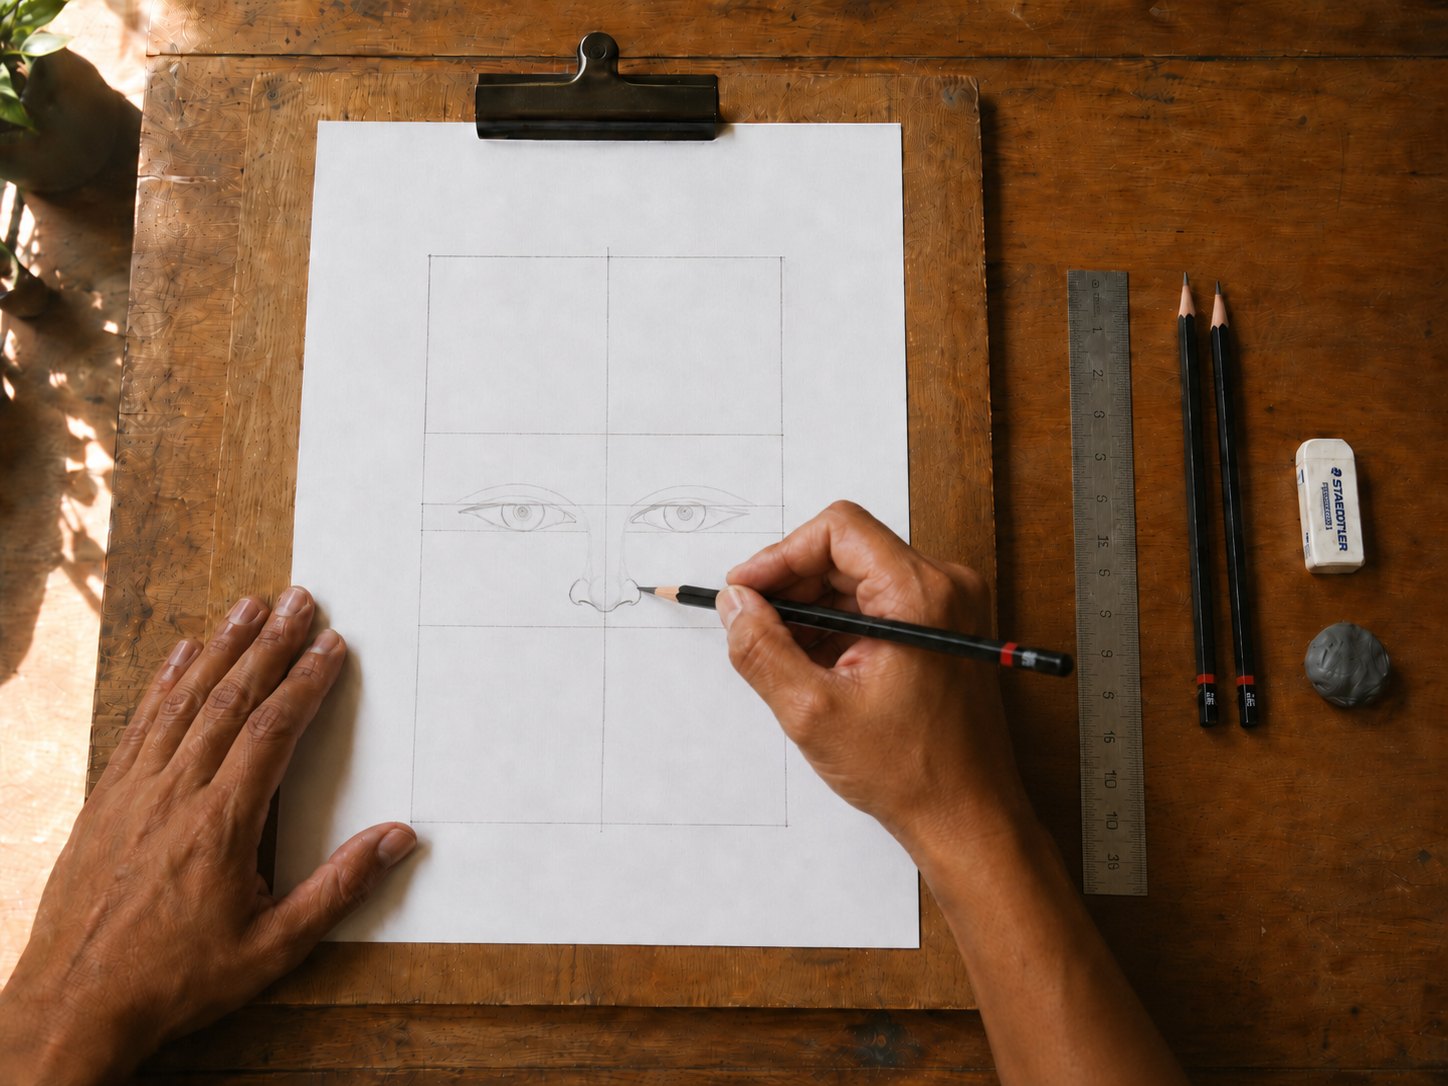
THAT'S IT! Simple nose.
How Small Should the Nose Be?
Here's the trick: The nose should be barely visible. If someone looks at your drawing from across the room, they should barely notice the nose.
✓ CORRECT: Subtle nose
✗ WRONG: Too prominent nose
Step 4: Drawing the Ears (Simple Ovals with Details)
Ears go on both sides of Box 2, anchored at eye level.
Ear = Simple Curved Shape
Draw the outer ear shape (like a vertical oval with a curve) Simple curved edges, like a stretched circle.
Add an inner curve (ear canal) One simple curved line inside.
Add the earlobe (rounded bulge at bottom) Elongated lobe (rounds below)
Done!
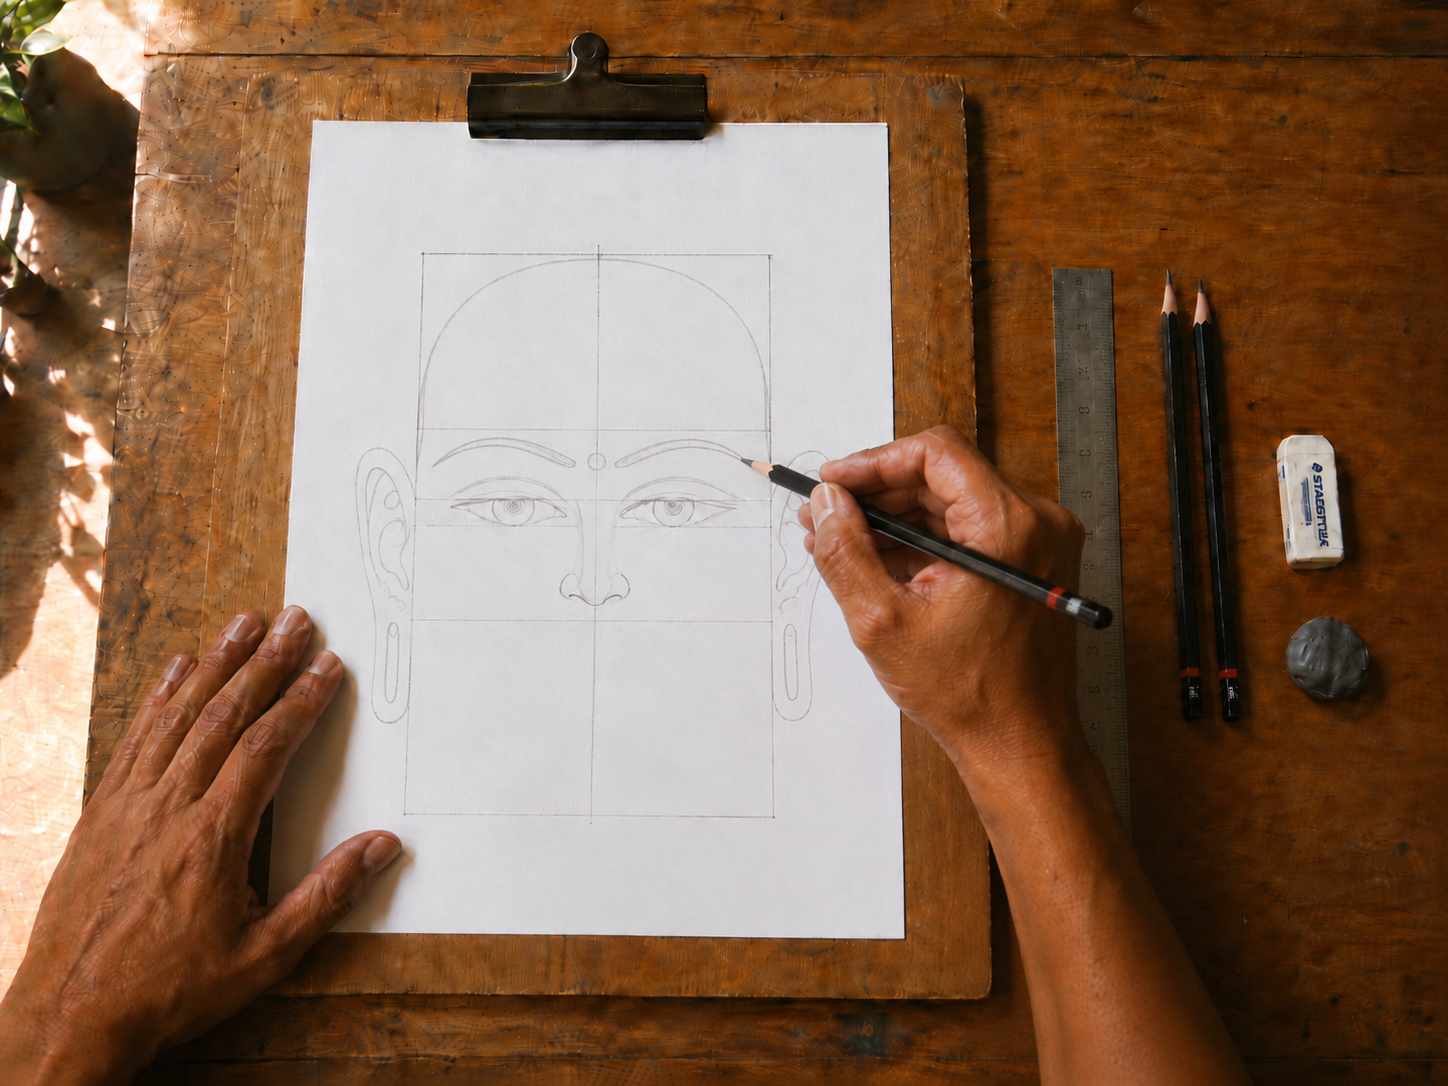
Step 5: Drawing the Forehead & Urna (The Spiritual Mark)
The forehead is Box 1 should look smooth and peaceful ,No Wrinkles Simple forehead (just the shape):
The urna is a small circle between the eyebrows. It represents the Buddha's wisdom.
Forehead with urna:
Simple Urna Options
Option 1: Simple dot
·
Option 2: Small circle
○
Option 3: Jeweled (with a little sparkle)
◉
Any of these works. Pick one and draw it small.
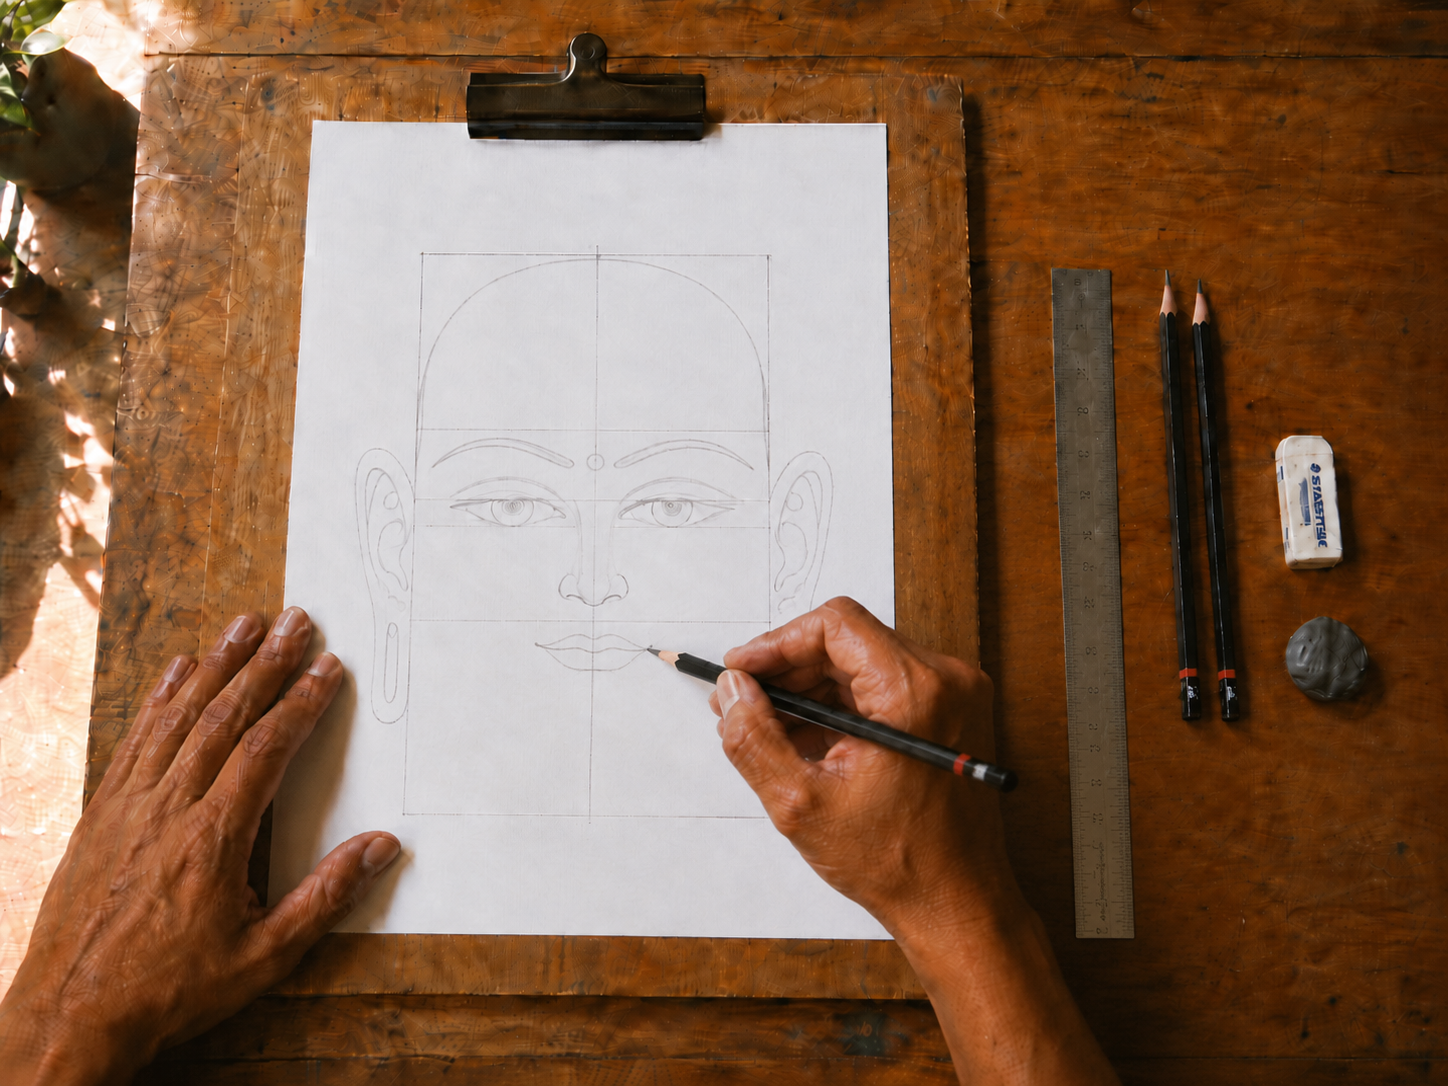
Step 6: Adding a Gentle Mouth
The mouth goes in Box 3 (lower box), below the nose.
Buddha Mouth = Soft, Serene Curve
A Buddha's mouth is peaceful, not smiling widely or frowning. It's a gentle, knowing expression.
Simple mouth options:
Option 1: Gentle straight line
─────
Option 2: Subtle upward curve (peaceful smile)
˜ ˜ ˜ or ∿∿∿
Option 3: Two curved lines (closed lips with gentle expression)
╭───╮
╰───╯
Any of these works. Keep it subtle and serene.
Step 7: Putting It All Together — Complete Beginner Face
Now let's draw a complete Buddha face from start to finish, step by step.
FINAL ASSEMBLY:
COMPLETE BUDDHA FACE (Beginner Level)
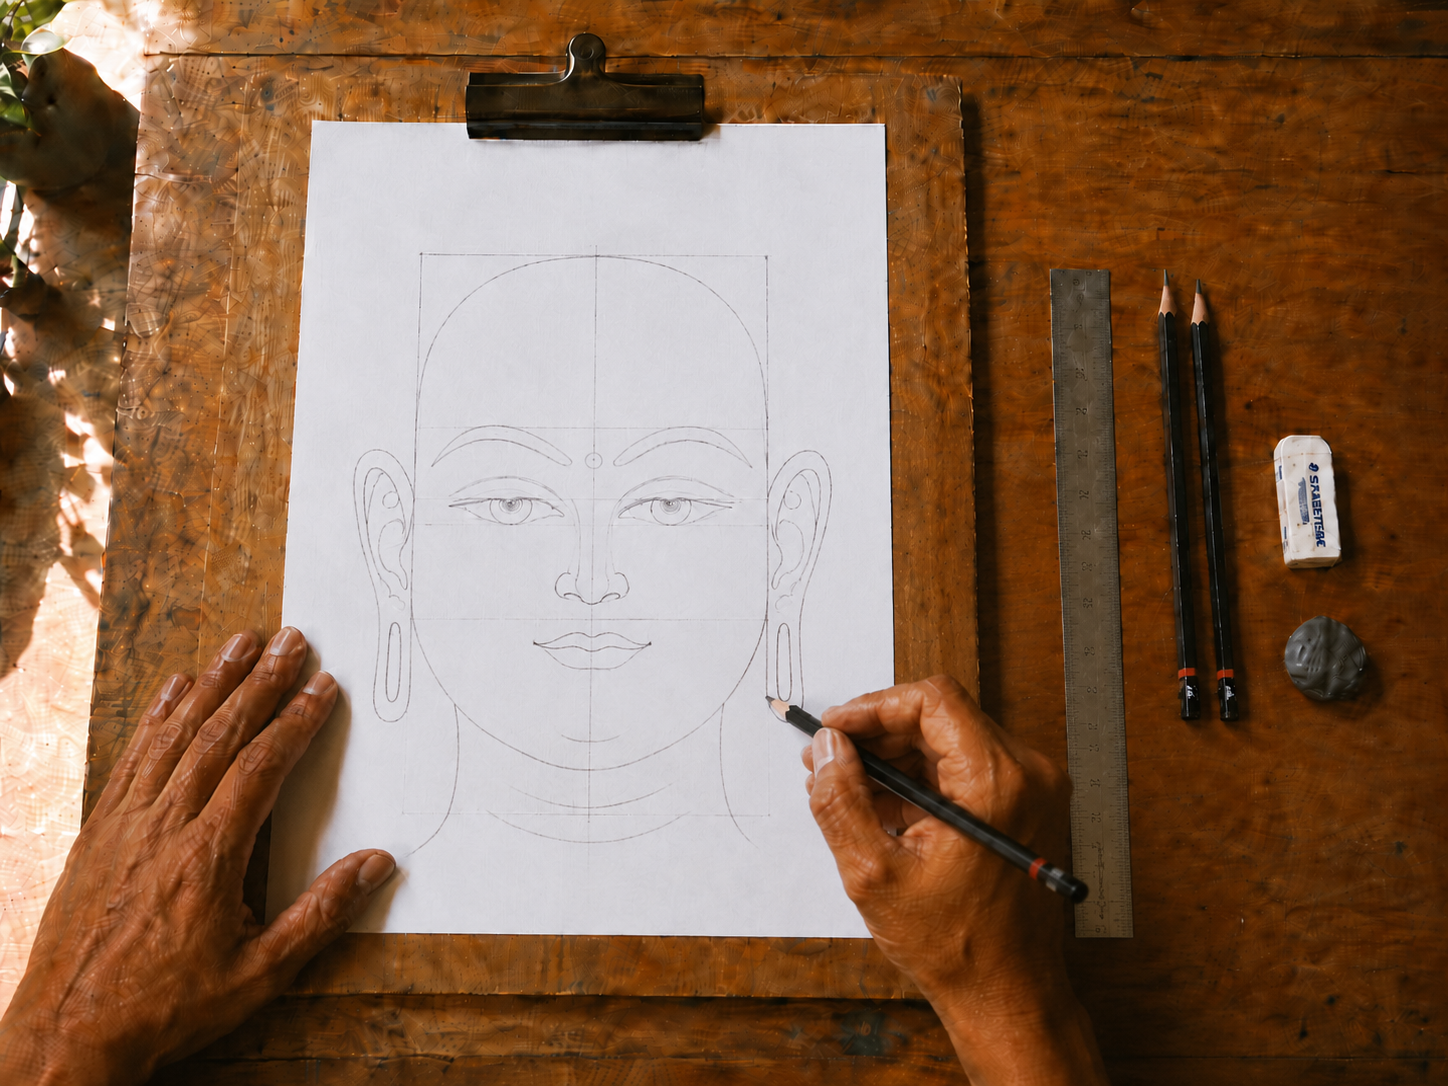
DONE! Your first Buddha face!
Step 8: Common Beginner Mistakes (& How to Fix Them)
| Mistake | What You Might Draw | The Problem | How to Fix |
|---|---|---|---|
| Eyes too big | Giant eyes | Makes face look childish or startled | Make eyes smaller; each eye = 1/5 of face width |
| Eyes at different heights | One eye higher than other | Looks lopsided; breaks symmetry | Draw a light horizontal line; place both eyes on it |
| Nose too big | Prominent nose | Distracts from the peaceful gaze | Make it smaller; just tiny lines, barely visible |
| Nostrils like circles | ○ ○ | Looks crude | Use tiny dots (· ·) or small vertical lines (╎╎) |
| Forehead wrinkled | Lots of lines on forehead | Contradicts peace and wisdom | Keep forehead smooth; minimal or no lines |
| Urna off-center | Mark to the left or right | Breaks balance | Place it directly between eyebrows, above nose bridge |
| Ears too small | Tiny ear nubs | Looks wrong proportionally | Ears extend from eyebrow to nose-tip level |
| Mouth too big or sad | Wide grin or frown | Contradicts serene expression | Keep mouth gentle, subtle, peaceful |
Step 9: Practice Progression (Do This!) Just Eyes (5 minutes)
Draw 10 pairs of Buddha eyes in a row. Don't draw a full face—just eyes. Focus on:
- Making them the same size
- Placing them at the same height
- Keeping them calm and almond-shaped
Grid Only (5 minutes)
Draw 5 three-box grids with just the proportions. No features yet—just boxes and centerlines.
Get comfortable with the structure before adding details.
Face 1 — Simple Version (15 minutes)
Draw your first complete Buddha face using this section. Don't worry about perfection. Just focus on:
Getting all three boxes
- Eyes symmetrical
- Nose tiny
- Ears proportional
Face 2 — Refine (20 minutes)
Redraw. This time, pay attention to:
- Eye detail (iris, pupil, highlight)
- Mouth expression (serene, not forced)
- Urna placement (perfectly centered)
Face 3 — Add Tone (30 minutes)
Draw again, but this time add shading:
- Light shadow around eyes (makes them stand out)
- Subtle shadow on cheekbones
- Barely any shadow on forehead (keep it luminous)
Step 10: Adding Color or Gold (Optional)
Once you're comfortable with pencil, try adding color.
With Gouache or Acrylic (Modern):
Underdrawing: Pencil grid and proportions (light)
Skin tone wash: Mix ochre + white + tiny bit of red (thin layer)
- Eyes: Dark blue or indigo iris; black pupil
- Lips: Soft red or coral (subtle, not bright)
- Highlights: White for eye glints, urna glow
- Optional gold: Gold paint on urna (if desired)
With Traditional Gold & Pigment:
Fine ink outline: Black ink or gold (using fine sable brush)
Gold underlay: Shell-gold base for urna and highlights
Pigment layers: Lapis lazuli for eyes, vermillion for lips
Final details: White chalk-based highlights
With Just Pencil:
That's fine too! Pencil Buddha faces look beautiful and professional.
Final Tips for Beginners
✓ Draw lightly first. Use light pencil strokes for initial proportions; darken later.
✓ Use a ruler. Straight lines for boxes and centerline keep everything symmetrical.
✓ Don't erase constantly. Light pencil lines can be cleaned up at the end.
✓ Compare to reference. Look at actual Buddha thangka faces while drawing; notice proportions.
✓ Practice repetition. The 10th face will be noticeably better than the 1st.
✓ Stay patient. Buddha face drawing is a meditation—not a race.
Draw one face every day for a week. By day 7, you'll see the transformation in your work.
👉 Back to the main guide: The Complete Guide to Tibetan Thangka Painting